 The themes gallery for selecting an accessible layout in PowerPoint for Mac." />
PowerPoint for Microsoft 365 PowerPoint for Microsoft 365 for Mac PowerPoint for the web PowerPoint 2021 PowerPoint 2021 for Mac PowerPoint 2019 PowerPoint 2019 for Mac PowerPoint 2016 PowerPoint for iPad PowerPoint for iPhone PowerPoint for Android tablets PowerPoint for Android phones More. Less
This topic gives you step-by-step instructions and best practices for making your PowerPoint presentations accessible and unlock your content to everyone, including people with disabilities.
PowerPoint has many features built-in that help people with different abilities to read and author presentations. In this topic, you learn, for example, how to work with the Accessibility Checker to tackle accessibility issues while you're creating your presentation. You'll also learn how to add alt texts to images so that people using screen readers are able to listen to what the image is all about. You can also read about how to use slide design, fonts, colors, and styles to maximize the inclusiveness of your slides before you share or present them to your audience.
The following table includes key best practices for creating PowerPoint presentations that are accessible to people with disabilities.
Include alternative text with all visuals.
To find missing alternative text, use the Accessibility Checker.
Alternative text helps people who can’t see the screen to understand what’s important in images and other visuals.
Make sure slide contents can be read in the order that you intend.
Use the Accessibility Checker to find slides that have possible problems with reading order.
Try navigating your slides with a screen reader.
A screen reader reads the elements of a slide in the order they were added to the slide, which might be very different from the order in which things appear.
Add meaningful and accurate hyperlink text and ScreenTips.
To determine whether hyperlink text makes sense as standalone information, visually scan the slides in your presentation.
People who use screen readers sometimes scan a list of links.
Tip: You can also add ScreenTips that appear when your cursor hovers over text or images that include a hyperlink.
Ensure that color is not the only means of conveying information.
Select Start > Settings > Accessibility > Color filters. Turn on the Color filter switch, and then select Grayscale. Visually scan each slide in your presentation for instances of color-coding.
People who are blind, have low vision, or are colorblind might miss out on the meaning conveyed by particular colors.
Use sufficient contrast for text and background colors.
To find insufficient color contrast, use the Accessibility Checker.
You can also look for text in your presentation that’s hard to read or to distinguish from the background.
Strong contrast between text and background makes it easier for people with low vision or colorblindness to see and use the content.
Give every slide a unique title.
To find slides that do not have titles, use the Accessibility Checker.
People who are blind, have low vision, or have a reading disability rely on slide titles to navigate. For example, by skimming or using a screen reader, they can quickly scan through a list of slide titles and go right to the slide they want.
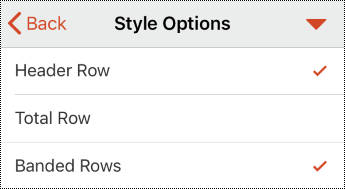
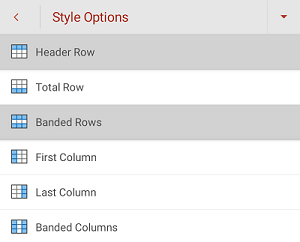
If you must use tables, create a simple table structure for data only, and specify column header information.
To ensure that tables don't contain split cells, merged cells, or nested tables, use the Accessibility Checker.
Screen readers keep track of their location in a table by counting table cells.
Screen readers also use header information to identify rows and columns.
Use a larger font size (18pt or larger), sans serif fonts, and sufficient white space.
To find potential issues related to fonts or white space, review your slides for areas that look crowded or illegible.
People who have dyslexia describe seeing text merge or distort.
Make videos accessible to people who have a vision or hearing disability.
Subtitles typically contain a transcription (or translation) of the dialogue.
Closed captions typically also describe audio cues such as music or sound effects that occur off-screen.
Video description means audio-narrated descriptions of a video's key visual elements. These descriptions are inserted into natural pauses in the program's dialogue. Video description makes videos more accessible to people who are blind or have low vision.
Create accessible PDFs or other file formats of your presentation.
Include accessibility tags to PDF files you create from your presentation. The tags make it possible for screen readers and other assistive technologies to read and navigate a document.
You can also save the presentation in a format that can be ported to a Braille reader.
The Accessibility Checker is a tool that reviews your content and flags accessibility issues it comes across. It explains why each issue might be a potential problem for someone with a disability. The Accessibility Checker also suggests how you can resolve the issues that appear.
In PowerPoint, the Accessibility Checker runs automatically in the background when you're creating a presentation. If the Accessibility Checker detects accessibility issues, you will get a reminder in the status bar.
To manually launch the Accessibility Checker, select Review > Check Accessibility. The Accessibility pane opens, and you can now review and fix accessibility issues. For more info, go to Improve accessibility with the Accessibility Checker.
The following procedures describe how to make the slides in your PowerPoint presentations accessible. For more info, go to Video: Create slides with an accessible reading order and Video: Design slides for people with dyslexia.
Use one of the accessible PowerPoint templates to make sure that your slide design, colors, contrast, and fonts are accessible for all audiences. They are also designed so that screen readers can more easily read the slide content.
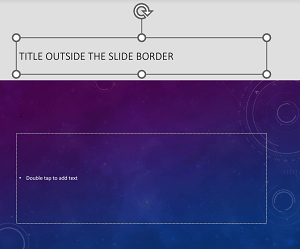
One simple step towards inclusivity is having a unique, descriptive title on each slide, even if it isn't visible. A person with a visual disability that uses a screen reader relies on the slide titles to know which slide is which.
Use the Accessibility ribbon to make sure every slide has a title. For instructions, go to Title a slide and expand the "Use the Accessibility ribbon to title a slide" section.
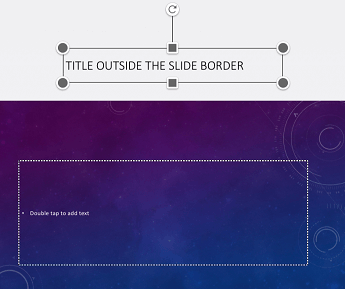
You can position a title off the slide. That way, the slide has a title for accessibility, but you save space on the slide for other content. For instructions, go to Title a slide and expand the "Put a title on a slide, but make the title invisible" section.
If you want all or many of your slide titles to be hidden, you can modify the slide master. For instructions, go to Title a slide and expand the "Systematically hide slide titles" section.
If you've moved or edited a placeholder on a slide, you can reset the slide to its original design. All formatting (for example, fonts, colors, effects) go back to what has been assigned in the template. Restoring the design might also help you find title placeholders which need a unique title.
Some people with visual disabilities use a screen reader to read the information on the slide. When you create slides, putting the objects in a logical reading order is crucial for screen reader users to understand the slide.
Use the Accessibility Checker and the Reading Order pane to set the order in which the screen readers read the slide contents. When the screen reader reads the slide, it reads the objects in the order they are listed in the Reading Order pane.
For the step-by-step instructions how to set the reading order, go to Make slides easier to read by using the Reading Order pane.
PowerPoint has built-in, predesigned slide designs that contain placeholders for text, videos, pictures, and more. They also contain all the formatting, such as theme colors, fonts, and effects. To make sure that your slides are accessible, the built-in layouts are designed so that the reading order is the same for people who use assistive technologies such as screen readers and people who see. For more info, go to Video: Use accessible colors and styles in slides.
In general, avoid tables if possible and present the data another way, like paragraphs with headings. Tables with fixed width might prove difficult to read for people who use Magnifier, because such tables force the content to a specific size. This makes the font very small, which forces Magnifier users to scroll horizontally, especially on mobile devices.
If you have to use tables, use the following guidelines to make sure your table is as accessible as possible:
Screen readers keep track of their location in a table by counting table cells. If a table is nested within another table or if a cell is merged or split, the screen reader loses count and can’t provide helpful information about the table after that point. Blank cells in a table could also mislead someone using a screen reader into thinking that there is nothing more in the table. Use a simple table structure for data only and specify column header information. Screen readers also use header information to identify rows and columns.
To ensure that tables don't contain split cells, merged cells, or nested tables, use the Accessibility Checker.
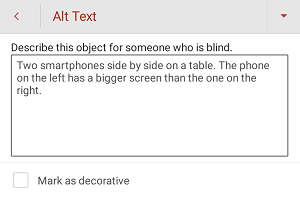
Alt text helps people who use screen readers to understand what’s important in the visuals in your slides. Visual content includes pictures, SmartArt graphics, shapes, groups, charts, embedded objects, ink, and videos.
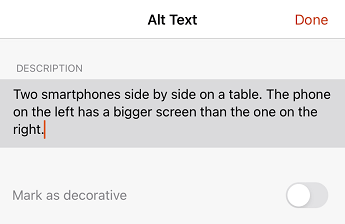
In alt text, briefly describe the image, its intent, and what is important about the image. Screen readers read the description to users who can’t see the content.
Tip: To write a good alt text, make sure to convey the content and the purpose of the image in a concise and unambiguous manner. The alt text shouldn’t be longer than a short sentence or two—most of the time a few thoughtfully selected words will do. Do not repeat the surrounding textual content as alt text or use phrases referring to images, such as, "a graphic of" or "an image of." For more info on how to write alt text, go to Everything you need to know to write effective alt text.
Avoid using text in images as the sole method of conveying important information. If you use images with text in them, repeat the text in the slide. In alt text of such images, mention the existence of the text and its intent.
PowerPoint for PC in Microsoft 365 automatically generates alt texts for photos, stock images, and the PowerPoint icons by using intelligent services in the cloud. Always check the autogenerated alt texts to make sure they convey the right message. If necessary, edit the text. For charts, SmartArt, screenshots, or shapes, you need to add the alt texts manually.
To find missing alternative text, use the Accessibility Checker.
Note: For audio and video content, in addition to alt text, include closed captioning for people who are deaf or have limited hearing.
People who use screen readers sometimes scan a list of links. Links should convey clear and accurate information about the destination. For example, avoid using link texts such as "Click here," "See this page," "Go here," or "Learn more." Instead include the full title of the destination page. You can also add ScreenTips that appear when your cursor hovers over text or images that include a hyperlink.
Tip: If the title on the hyperlink's destination page gives an accurate summary of what’s on the page, use it for the hyperlink text. For example, this hyperlink text matches the title on the destination page: Create more with Microsoft templates.
For the step-by-step instructions on how to create hyperlinks and ScreenTips, go to Add a hyperlink to a slide.
An accessible font doesn't exclude or slow down the reading speed of anyone reading a slide, including people with low vision or reading disability or people who are blind. The right font improves the legibility and readability of the text in the presentation.
For the step-by-step instructions on how to change fonts in PowerPoint go to Change the fonts in a presentation or Change the default font in PowerPoint.
To reduce the reading load, select familiar sans serif fonts such as Arial or Calibri. Avoid using all capital letters and excessive italics or underlines.
A person with a vision disability might miss out on the meaning conveyed by particular colors. For example, add an underline to color-coded hyperlink text so that people who are colorblind know that the text is linked even if they can’t see the color. For headings, consider adding bold or using a larger font.
Here are some ideas to consider:
PowerPoint supports the playback of video with multiple audio tracks. It also supports closed captions and subtitles that are embedded in video files.
Currently, only PowerPoint for Windows supports insertion and playback of closed captions or subtitles that are stored in files separate from the video. For all other editions of PowerPoint (such as PowerPoint for macOS or the mobile editions), closed captions or subtitles must be encoded into the video before they are inserted into PowerPoint.
Supported video formats for captions and subtitles vary depending on the operating system that you're using. Each operating system has settings to adjust how the closed captions or subtitles are displayed. For more information, go to Closed Caption file types supported by PowerPoint.
Closed captions, subtitles, and alternative audio tracks are not preserved when you use the Compress Media or Optimize Media Compatibility features. Also, when turning your presentation into a video, closed captions, subtitles, or alternative audio tracks in the embedded videos are not included in the video that is saved.
When you use the Save Media as command on a selected video, closed captions, subtitles, and multiple audio tracks embedded in the video are preserved in the video file that is saved.
To make your PowerPoint presentations with videos accessible, ensure the following:
You can save your presentation in a format that can be easily read by a screen reader or be ported to a Braille reader. For instructions, go to Video: Save a presentation in a different format or Create accessible PDFs. Before converting a presentation into another format, make sure you run the Accessibility Checker and fix all reported issues.
When your presentation is ready and you've run the Accessibility Checker to make sure it is inclusive, you can try navigating the slides using a screen reader, for example, Narrator. Narrator comes with Windows, so there's no need to install anything. This is one additional way to spot issues in the navigation order, for example.
The following table includes key best practices for creating PowerPoint presentations that are accessible to people with disabilities.
Avoid common accessibility issues such as missing alternative text (alt text) and low contrast colors.
Make it easy for everyone to read your slides.
When creating a new slide, use the built-in slide designs.
The built-in layouts automatically make sure that the reading order works for everyone.
Make sure slide contents can be read in the order that you intend.
Use the Accessibility Checker to find slides that have possible problems with reading order.
To make sure everyone reads the contents in the order you intend, it's important to check the reading order.
Ensure that color is not the only means of conveying information.
Visually scan the slides in your presentation.
People who are blind, have low vision, or are colorblind might miss out on the meaning conveyed by particular colors.
Use sufficient contrast for text and background colors.
To find insufficient color contrast, use the Accessibility Checker.
You can also look for text on your slides that’s hard to read or to distinguish from the background.
Use strong contrast between text and background, so people with low vision can see and use the content.
Give every slide a unique title.
To find slides that do not have titles, use the Accessibility Checker.
People who are blind, have low vision, or have a reading disability rely on slide titles to navigate. For example, by skimming or using a screen reader, they can quickly scan through a list of slide titles and go right to the slide they want.
If you must use tables, use a simple table structure for data only, and specify column header information.
To ensure that tables don't contain split cells, merged cells, or nested tables, use the Accessibility Checker.
Screen readers keep track of their location in a table by counting table cells.
Screen readers also use header information to identify rows and columns.
Include alternative text with all visuals.
To find missing alternative text, use the Accessibility Checker.
Alternative text helps people who can’t see the screen to understand what’s important in images and other visuals.
Add meaningful hyperlink text and ScreenTips.
To determine whether hyperlink text makes sense as standalone information and whether it gives readers accurate information about the destination target, visually scan the slides in your presentation.
People who use screen readers sometimes scan a list of links. You can also add ScreenTips that appear when your cursor hovers over text or images that include a hyperlink.
Use a larger font size (18pt or larger), sans serif fonts, and sufficient white space.
To find potential issues related to fonts or white space, review your slides for areas that look crowded or illegible.
People who have dyslexia describe seeing text “swim together” on a page (the compressing of one line of text into the line below). They often see text merge or distort.
Make videos accessible to people who have a vision or hearing disability.
Subtitles typically contain a transcription (or translation) of the dialogue.
Closed captions typically also describe audio cues such as music or sound effects that occur off-screen.
Video description means audio-narrated descriptions of a video's key visual elements. These descriptions are inserted into natural pauses in the program's dialogue. Video description makes videos more accessible to people who are blind or have low vision.
The Accessibility Checker is a tool that reviews your content and flags accessibility issues it comes across. It explains why each issue might be a potential problem for someone with a disability. The Accessibility Checker also suggests how you can resolve the issues that appear.
To manually launch the Accessibility Checker, select Review > Check Accessibility. The Accessibility pane opens, and you can now review and fix accessibility issues. For more info, go to Improve accessibility with the Accessibility Checker.
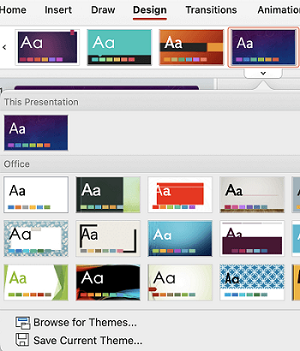
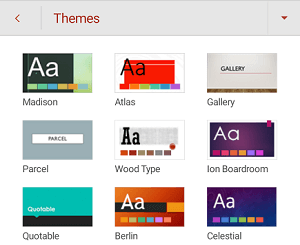
PowerPoint has built-in slide designs that contain placeholders for text, videos, pictures, and more. They also contain all the formatting, such as theme colors, fonts, and effects. To make sure that your slides are accessible, the built-in layouts are designed so that the reading order is the same for people who see and people who use technology such as screen readers.
Tip: For more info on what to consider when you're creating slides for people with dyslexia, go to Design slides for people with dyslexia.
The themes gallery for selecting an accessible layout in PowerPoint for Mac." />
Use one of the accessible PowerPoint templates to make sure that your slide design, colors, contrast, and fonts are accessible for all audiences. They are also designed so that screen readers can more easily read the slide content.
One simple step towards inclusivity is having a unique, descriptive title on each slide, even if it isn't visible. A person with a visual disability that uses a screen reader relies on the slide titles to know which slide is which.
Use the Accessibility ribbon to make sure every slide has a title. For the step-by-step instructions, go to Title a slide and expand the "Use the Accessibility ribbon to title a slide" section.
Tip: If you've moved or edited a placeholder on a slide, you can reset the slide to its original design. All formatting (for example, fonts, colors, effects) go back to what has been assigned in the template. Restoring the original design might also help you find title placeholders which need a unique title. To restore all placeholders for the selected slide, on the Home tab, select Reset.
You can position a title off the slide. That way, the slide has a title for accessibility, but you save space on the slide for other content. For the step-by-step instructions, go to Title a slide and expand the "Put a title on a slide, but make the title invisible" section.
If you want all or many of your slide titles to be hidden, you can modify the slide master. For the step-by-step instructions, go to Title a slide and expand the "Systematically hide slide titles" section.
When someone who can see reads a slide, they usually read things, such as text or a picture, in the order the elements appear on the slide. In contrast, a screen reader reads the elements on a slide in the order they were added to the slide, which might be very different from the order in which things appear.
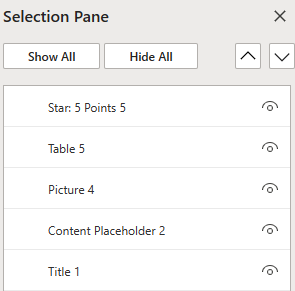
Use the Selection Pane to set the order in which screen readers read the slide contents. Screen readers read the objects in the reverse of the order they are listed in the Selection Pane.
To find slides with a problematic reading order, use the Accessibility Checker.
In general, avoid tables if possible and present the data another way, like paragraphs with headings. Tables with fixed width might prove difficult to read for people who use magnifying features or apps, because such tables force the content to a specific size. This makes the font very small, which forces magnifier users to scroll horizontally, especially on mobile devices.
If you have to use tables, use the following guidelines to make sure your table is as accessible as possible:
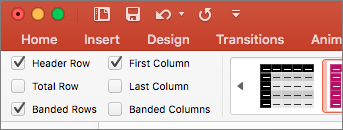
If you do need to use tables, add headers to your table to help screen readers keep track of the columns and rows. If a table is nested within another table or if a cell is merged or split, the screen reader loses count and can’t provide helpful information about the table after that point. Blank cells in a table could also mislead someone using a screen reader into thinking that there is nothing more in the table. Screen readers also use header information to identify rows and columns.
Alt text helps people who use screen readers to understand what’s important in the visuals in your slides. Visual content includes pictures, SmartArt graphics, shapes, groups, charts, embedded objects, ink, and videos.
In alt text, briefly describe the image, its intent, and what is important about the image. Screen readers read the description to users who can’t see the content.
Tip: To write a good alt text, make sure to convey the content and the purpose of the image in a concise and unambiguous manner. The alt text shouldn’t be longer than a short sentence or two—most of the time a few thoughtfully selected words will do. Do not repeat the surrounding textual content as alt text or use phrases referring to images, such as, "a graphic of" or "an image of." For more info on how to write alt text, go to Everything you need to know to write effective alt text.
Avoid using text in images as the sole method of conveying important information. If you use images with text in them, repeat the text in the slide. In alt text of such images, mention the existence of the text and its intent.
For the step-by-step instructions on how to add or edit alt text, go to Add alternative text to a shape, picture, chart, SmartArt graphic, or other object.
To find missing alternative text, use the Accessibility Checker.
People who use screen readers sometimes scan a list of links. Links should convey clear and accurate information about the destination. For example, avoid using link texts such as "Click here," "See this page," "Go here," or "Learn more." Instead include the full title of the destination page. You can also add ScreenTips that appear when your cursor hovers over text or images that include a hyperlink.
Tip: If the title on the hyperlink's destination page gives an accurate summary of what’s on the page, use it for the hyperlink text. For example, this hyperlink text matches the title on the destination page: Create more with Microsoft templates.
For the step-by-step instructions on how to create hyperlinks, go to Add a hyperlink to a slide.
An accessible font doesn't exclude or slow down the reading speed of anyone reading a slide, including people with low vision or reading disability or people who are blind. The right font improves the legibility and readability of the text in the presentation.
For the step-by-step instructions on how to change fonts in PowerPoint, go to Change the fonts in a presentation.
To reduce the reading load, select familiar sans serif fonts such as Arial or Calibri. Avoid using all capital letters and excessive italics or underlines.
A person with a vision disability might miss out on the meaning conveyed by particular colors. For example, add an underline to color-coded hyperlink text so that people who are colorblind know that the text is linked even if they can’t see the color. For headings, consider adding bold or using a larger font.
Here are some ideas to consider:
People with dyslexia perceive text in a way that can make it difficult to distinguish letters and words. For example, they might perceive a line of text compressing into the line below, or adjacent letters seeming to merge. Also, having multiple blank lines or consecutive spaces can make keyboard navigation slow and screen reader usage more cumbersome.
Align your paragraph to the left to avoid uneven gaps between words, and increase or decrease the white space between lines to improve readability. Include sufficient white space between lines and paragraphs but avoid more than two spaces between words and two blank lines between paragraphs.

To make it easier for screen readers to read your slides, organize the information into small chunks such as bulleted or numbered lists.
Design lists so that you do not need to add a plain paragraph without a bullet or number to the middle of a list. If your list is broken up by a plain paragraph, some screen readers might announce the number of list items wrong. Also, the user might hear in the middle of the list that they are leaving the list.


(Bullets) or
PowerPoint supports the playback of video with multiple audio tracks. It also supports closed captions and subtitles that are embedded in video files.
Closed captions or subtitles must be encoded into the video before it is inserted into PowerPoint. PowerPoint does not support closed captions or subtitles that are stored in a separate file from the video file.
Supported video formats for captions and subtitles vary depending on the operating system that you're using. Each operating system has settings to adjust how the closed captions or subtitles are displayed. For more information, go to Closed Caption file types supported by PowerPoint.
Closed captions, subtitles, and alternative audio tracks are not preserved when you use the Compress Media or Optimize Media Compatibility features. To learn more about optimizing media for compatibility, go to the section "Optimize media in your presentation for compatibility" in Are you having video or audio playback issues? Also, when turning your presentation into a video, closed captions, subtitles, or alternative audio tracks in the embedded videos are not included in the video that is saved.
When you use the Save Media as command on a selected video, closed captions, subtitles, and multiple audio tracks embedded in the video are preserved in the video file that is saved. For more info, go to Save embedded media from a presentation (audio or video).
To make your PowerPoint presentations with videos accessible, ensure the following:
When your presentation is ready and you've run the Accessibility Checker to make sure it is inclusive, you can try navigating the slides using a screen reader, for example, VoiceOver. VoiceOver comes with macOS, so there's no need to install anything. This is one additional way to spot issues in the navigation order, for example.
The following table includes key best practices for creating PowerPoint presentations that are accessible to people with disabilities.
Make sure slide contents can be read in the order that you intend.
A screen reader reads the elements of a slide in the order they were added to the slide, which might be very different from the order in which things appear.
Give every slide a unique title.
People who are blind, have low vision, or have a reading disability rely on slide titles to navigate.
If you must use tables, use a simple table structure for data only, and specify column header information.
Screen readers keep track of their location in a table by counting table cells.
Screen readers also use header information to identify rows and columns.
Include alternative text with all visuals and tables.
Alternative text helps people who can’t see the screen to understand what’s important in images and other visuals.
Add meaningful and accurate hyperlink text.
People who use screen readers sometimes scan a list of links.
Ensure that color is not the only means of conveying information.
People who are blind, have low vision, or are colorblind might miss out on the meaning conveyed by particular colors.
Use sufficient contrast for text and background colors.
The text in your presentations should be readable in a high contrast mode so that everyone, including people with visual disabilities, can see it well.
Use a larger font size (18pt or larger), sans serif fonts, and sufficient white space.
People who have dyslexia describe seeing text “swim together” on a slide (the compressing of one line of text into the line below). They often see text merge or distort.
Use built-in lists.
Organize and structure the information in your slides into small units which are easy to read, navigate, and skim through.
Make videos accessible to people who have a vision or hearing disability.
Subtitles typically contain a transcription (or translation) of the dialogue.
Closed captions typically also describe audio cues such as music or sound effects that occur off-screen.
Video description means audio-narrated descriptions of a video's key visual elements. These descriptions are inserted into natural pauses in the program's dialogue. Video description makes videos more accessible to people who are blind or have low vision.
PowerPoint has built-in, predesigned slide designs that contain placeholders for text, videos, pictures, and more. They also contain all the formatting, such as theme colors, fonts, and effects. To make sure that your slides are accessible, the built-in layouts are designed so that the reading order is the same for people who use assistive technologies such as screen readers and people who see.
One simple step towards inclusivity is having a unique, descriptive title on each slide, even if it isn't visible. A person with a visual disability that uses a screen reader relies on the slide titles to know which slide is which. With descriptive titles on each slide, everyone can quickly scan through a list of slide titles and go right to the slide they want.
You can position a title off the slide. That way, the slide has a title for accessibility, but you save space on the slide for other content.
In general, avoid tables if possible and present the data another way, like paragraphs with headings. Tables with fixed width might prove difficult to read for people who use Magnifier, because such tables force the content to a specific size. This makes the font very small, which forces Magnifier users to scroll horizontally, especially on mobile devices.
If you have to use tables, use the following guidelines to make sure your table is as accessible as possible:
Screen readers keep track of their location in a table by counting table cells. If a table is nested within another table or if a cell is merged or split, the screen reader loses count and can’t provide helpful information about the table after that point. Blank cells in a table could also mislead someone using a screen reader into thinking that there is nothing more in the table. Use a simple table structure for data only and specify column header information. Screen readers also use header information to identify rows and columns.
Alt text helps people who use screen readers to understand what’s important in the visuals in your slides. Visual content includes pictures, SmartArt graphics, shapes, groups, charts, embedded objects, ink, and videos.
In alt text, briefly describe the image, its intent, and what is important about the image. Screen readers read the description to users who can’t see the content.
Tip: To write a good alt text, make sure to convey the content and the purpose of the image in a concise and unambiguous manner. The alt text shouldn’t be longer than a short sentence or two—most of the time a few thoughtfully selected words will do. Do not repeat the surrounding textual content as alt text or use phrases referring to images, such as, "a graphic of" or "an image of." For more info on how to write alt text, go to Everything you need to know to write effective alt text.
Avoid using text in images as the sole method of conveying important information. If you use images with text in them, repeat the text in the slide. In alt text of such images, mention the existence of the text and its intent.
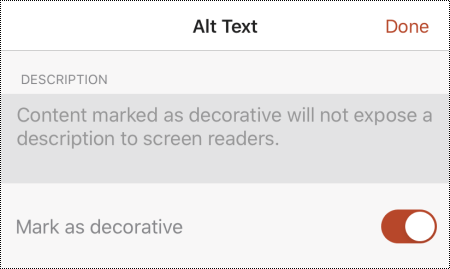
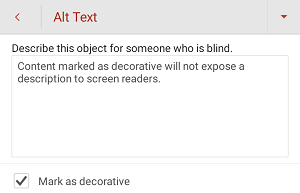
If your visuals are purely decorative and add visual interest but aren't informative, you can mark them as such without needing to write any alt text. Examples of objects that should be marked as decorative are stylistic borders. People using screen readers will hear that these objects are decorative, so they know they aren’t missing any important information.
People who use screen readers sometimes scan a list of links. Links should convey clear and accurate information about the destination. For example, avoid using link texts such as "Click here," "See this page," "Go here," or "Learn more." Instead include the full title of the destination page.
Tip: If the title on the hyperlink's destination page gives an accurate summary of what’s on the page, use it for the hyperlink text. For example, this hyperlink text matches the title on the destination page: Create more with Microsoft templates.
An accessible font doesn't exclude or slow down the reading speed of anyone reading a slide, including people with low vision or reading disability or people who are blind. The right font improves the legibility and readability of the text in the presentation.
To reduce the reading load, select familiar sans serif fonts such as Arial or Calibri. Avoid using all capital letters and excessive italics or underlines.
A person with a vision disability might miss out on the meaning conveyed by particular colors. For example, add an underline to color-coded hyperlink text so that people who are colorblind know that the text is linked even if they can’t see the color. For headings, consider adding bold or using a larger font.
The text in your presentation should be readable in a high contrast mode. For example, use bright colors or high-contrast color schemes on opposite ends of the color spectrum. White and black schemes make it easier for people who are colorblind to distinguish text and shapes.
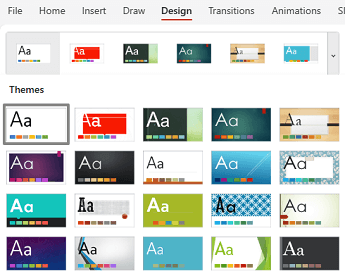
Use the predesigned Themes to make sure that your slide design is accessible. For instructions, go to Use built-in slide designs for inclusive reading order, colors, and more.
People with dyslexia perceive text in a way that can make it difficult to distinguish letters and words. For example, they might perceive a line of text compressing into the line below, or adjacent letters seeming to merge. Also, having multiple blank lines or consecutive spaces can make keyboard navigation slow and screen reader usage more cumbersome.
Align your paragraph to the left to avoid uneven gaps between words, and increase or decrease the white space between lines to improve readability. Include sufficient white space between lines and paragraphs but avoid more than two spaces between words and two blank lines between paragraphs.

(Show ribbon). On the Home tab, select
To make it easier for screen readers to read your slides, organize the information into small chunks such as bulleted or numbered lists.
Design lists so that you do not need to add a plain paragraph without a bullet or number to the middle of a list. If your list is broken up by a plain paragraph, some screen readers might announce the number of list items wrong. Also, the user might hear in the middle of the list that they are leaving the list.
PowerPoint supports the playback of video with multiple audio tracks. It also supports closed captions and subtitles that are embedded in video files.
Closed captions or subtitles must be encoded into the video before it is inserted into PowerPoint. PowerPoint does not support closed captions or subtitles that are stored in a separate file from the video file.
Supported video formats for captions and subtitles vary depending on the operating system that you're using. Each operating system has settings to adjust how the closed captions or subtitles are displayed. For more information, go to Closed Caption file types supported by PowerPoint.
Closed captions, subtitles, and alternative audio tracks are not preserved when you use the Compress Media or Optimize Media Compatibility features. To learn more about optimizing media for compatibility, go to the section "Optimize media in your presentation for compatibility" in Are you having video or audio playback issues? Also, when turning your presentation into a video, closed captions, subtitles, or alternative audio tracks in the embedded videos are not included in the video that is saved.
When you use the Save Media as command on a selected video, closed captions, subtitles, and multiple audio tracks embedded in the video are preserved in the video file that is saved. For more info, go to Save embedded media from a presentation (audio or video).
To make your PowerPoint presentations with videos accessible, ensure the following:
When your slides are ready, you can try a few things to make sure they are accessible:
The following table includes key best practices for creating PowerPoint presentations that are accessible to people with disabilities.
Make sure slide contents can be read in the order that you intend.
A screen reader reads the elements of a slide in the order they were added to the slide, which might be very different from the order in which things appear.
Give every slide a unique title.
People who are blind, have low vision, or have a reading disability rely on slide titles to navigate.
If you must use tables, use a simple table structure for data only, and specify column header information.
Screen readers keep track of their location in a table by counting table cells.
Screen readers also use header information to identify rows and columns.
Include alternative text (alt text) with all visuals.
Alt text helps people who can’t see the screen to understand what’s important in visuals, such as images and shapes.
Add meaningful and accurate hyperlink text.
People who use screen readers sometimes scan a list of links.
Ensure that color is not the only means of conveying information.
People who are blind, have low vision, or are colorblind might miss out on the meaning conveyed by particular colors.
Use sufficient contrast for text and background colors.
The text in your presentations should be readable in a high contrast mode so that everyone, including people with visual disabilities, can see it well.
Use a larger font size (18pt or larger), sans serif fonts, and sufficient white space.
People who have dyslexia describe seeing text “swim together” on a slide (the compressing of one line of text into the line below). They often see text merge or distort.
Use built-in lists.
Organize and structure the information in your slides into small units which are easy to read, navigate, and skim through.
Make videos accessible to people who have a vision or hearing disability.
Subtitles typically contain a transcription (or translation) of the dialogue.
Closed captions typically also describe audio cues such as music or sound effects that occur off-screen.
Video description means audio-narrated descriptions of a video's key visual elements. These descriptions are inserted into natural pauses in the program's dialogue. Video description makes videos more accessible to people who are blind or have low vision.
PowerPoint has built-in, predesigned slide designs that contain placeholders for text, videos, pictures, and more. They also contain all the formatting, such as theme colors, fonts, and effects. To make sure that your slides are accessible, the built-in layouts are designed so that the reading order is the same for people who use assistive technologies such as screen readers and people who see.
One simple step towards inclusivity is having a unique, descriptive title on each slide, even if it isn't visible. A person with a visual disability that uses a screen reader relies on the slide titles to know which slide is which. With descriptive titles on each slide, everyone can quickly scan through a list of slide titles and go right to the slide they want.
You can position a title off the slide. That way, the slide has a title for accessibility, but you save space on the slide for other content.
In general, avoid tables if possible and present the data another way, like paragraphs with headings. Tables with fixed width might prove difficult to read for people who use Magnifier, because such tables force the content to a specific size. This makes the font very small, which forces Magnifier users to scroll horizontally, especially on mobile devices.
If you have to use tables, use the following guidelines to make sure your table is as accessible as possible:
Screen readers keep track of their location in a table by counting table cells. If a table is nested within another table or if a cell is merged or split, the screen reader loses count and can’t provide helpful information about the table after that point. Blank cells in a table could also mislead someone using a screen reader into thinking that there is nothing more in the table. Use a simple table structure for data only and specify column header information. Screen readers also use header information to identify rows and columns.
(More options).
Alt text helps people who use screen readers to understand what’s important in the visuals in your slides. Visual content includes pictures, SmartArt graphics, shapes, groups, charts, embedded objects, ink, and videos.
In alt text, briefly describe the image, its intent, and what is important about the image. Screen readers read the description to users who can’t see the content.
Tip: To write a good alt text, make sure to convey the content and the purpose of the image in a concise and unambiguous manner. The alt text shouldn’t be longer than a short sentence or two—most of the time a few thoughtfully selected words will do. Do not repeat the surrounding textual content as alt text or use phrases referring to images, such as, "a graphic of" or "an image of." For more info on how to write alt text, go to Everything you need to know to write effective alt text.
Avoid using text in images as the sole method of conveying important information. If you use images with text in them, repeat the text in the slide. In alt text of such images, mention the existence of the text and its intent.
If your visuals are purely decorative and add visual interest but aren't informative, you can mark them as such without needing to write any alt text. Examples of objects that should be marked as decorative are stylistic borders. People using screen readers will hear that these objects are decorative, so they know they aren’t missing any important information.
People who use screen readers sometimes scan a list of links. Links should convey clear and accurate information about the destination. For example, avoid using link texts such as "Click here," "See this page," "Go here," or "Learn more." Instead include the full title of the destination page.
Tip: If the title on the hyperlink's destination page gives an accurate summary of what’s on the page, use it for the hyperlink text. For example, this hyperlink text matches the title on the destination page: Create more with Microsoft templates.
An accessible font doesn't exclude or slow down the reading speed of anyone reading a slide, including people with low vision or reading disability or people who are blind. The right font improves the legibility and readability of the text in the presentation.
To reduce the reading load, select familiar sans serif fonts such as Arial or Calibri. Avoid using all capital letters and excessive italics or underlines.
A person with a vision disability might miss out on the meaning conveyed by particular colors. For example, add an underline to color-coded hyperlink text so that people who are colorblind know that the text is linked even if they can’t see the color. For headings, consider adding bold or using a larger font.
(More options).
The text in your presentation should be readable in a high contrast mode. For example, use bright colors or high-contrast color schemes on opposite ends of the color spectrum. White and black schemes make it easier for people who are colorblind to distinguish text and shapes.
Use the predesigned Themes to make sure that your slide design is accessible. For the step-by-step instructions, go to Use built-in slide designs for inclusive reading order, colors, and more.
People with dyslexia perceive text in a way that can make it difficult to distinguish letters and words. For example, they might perceive a line of text compressing into the line below, or adjacent letters seeming to merge. Also, having multiple blank lines or consecutive spaces can make keyboard navigation slow and screen reader usage more cumbersome.
Align your paragraph to the left to avoid uneven gaps between words, and increase or decrease the white space between lines to improve readability. Include sufficient white space between lines and paragraphs but avoid more than two spaces between words and two blank lines between paragraphs.

(More options). On the Home tab, select
To make it easier for screen readers to read your slides, organize the information into small chunks such as bulleted or numbered lists.
Design lists so that you do not need to add a plain paragraph without a bullet or number to the middle of a list. If your list is broken up by a plain paragraph, some screen readers might announce the number of list items wrong. Also, the user might hear in the middle of the list that they are leaving the list.

(More options).
PowerPoint supports the playback of video with multiple audio tracks. It also supports closed captions and subtitles that are embedded in video files.
Closed captions or subtitles must be encoded into the video before it is inserted into PowerPoint. PowerPoint does not support closed captions or subtitles that are stored in a separate file from the video file.
Supported video formats for captions and subtitles vary depending on the operating system that you're using. Each operating system has settings to adjust how the closed captions or subtitles are displayed. For more information, go to Closed Caption file types supported by PowerPoint.
Closed captions, subtitles, and alternative audio tracks are not preserved when you use the Compress Media or Optimize Media Compatibility features. To learn more about optimizing media for compatibility, go to the section "Optimize media in your presentation for compatibility" in Are you having video or audio playback issues? Also, when turning your presentation into a video, closed captions, subtitles, or alternative audio tracks in the embedded videos are not included in the video that is saved.
When you use the Save Media as command on a selected video, closed captions, subtitles, and multiple audio tracks embedded in the video are preserved in the video file that is saved. For more info, go to Save embedded media from a presentation (audio or video).
To make your PowerPoint presentations with videos accessible, ensure the following:
When your slides are ready, you can try a few things to make sure they are accessible:
The following table includes key best practices for creating PowerPoint for the web presentations that are accessible to people with disabilities.
Avoid common accessibility issues such as missing alternative text (alt text) and low contrast colors.
Make it easy for everyone to read your slides.
Use the built-in slide designs.
The built-in layouts automatically make sure that the reading order works for everyone.
Give every slide a unique title.
To find slides that do not have titles, use the Accessibility Checker.
People who are blind, have low vision, or have a reading disability rely on slide titles to navigate. For example, by skimming or using a screen reader, they can quickly scan through a list of slide titles and go right to the slide they want.
Make sure slide contents can be read in the order that you intend.
Use the Accessibility Checker to find slides that have possible problems with reading order.
To make sure everyone reads the contents in the order you intend, it's important to check the reading order.
Ensure that color is not the only means of conveying information.
Visually scan the slides in your presentation.
People who are blind, have low vision, or are colorblind might miss out on the meaning conveyed by particular colors.
Use sufficient contrast for text and background colors.
To find insufficient color contrast, use the Accessibility Checker.
You can also look for text on your slides that’s hard to read or to distinguish from the background.
Use strong contrast between text and background, so people with low vision can see and use the content.
If you must use tables, use a simple table structure for data only, and specify column header information.
To ensure that tables don't contain split cells, merged cells, or nested tables, use the Accessibility Checker.
Screen readers keep track of their location in a table by counting table cells.
Screen readers also use header information to identify rows and columns.
Include alternative text with all visuals and tables.
To find missing alt text, use the Accessibility Checker.
Alt text helps people who can’t see the screen to understand what’s important in images and other visuals.
Add meaningful hyperlink text.
To determine whether hyperlink text makes sense as standalone information and whether it gives readers accurate information about the destination target, visually scan the slides in your presentation.
People who use screen readers sometimes scan a list of links.
Use a larger font size (18pt or larger), sans serif fonts, and sufficient white space.
To find potential issues related to fonts or white space, review your slides for areas that look crowded or illegible.
People who have dyslexia describe seeing text “swim together” on a page (the compressing of one line of text into the line below). They often see text merge or distort.
Use built-in lists.
Organize and structure the information in your slides into small units which are easy to read, navigate, and skim through.
Make videos accessible to people who have a vision or hearing disability.
Subtitles typically contain a transcription (or translation) of the dialogue.
Closed captions typically also describe audio cues such as music or sound effects that occur off-screen.
Video description means audio-narrated descriptions of a video's key visual elements. These descriptions are inserted into natural pauses in the program's dialogue. Video description makes videos more accessible to people who are blind or have low vision.
The Accessibility Checker is a tool that reviews your content and flags accessibility issues it comes across. It explains why each issue might be a potential problem for someone with a disability. The Accessibility Checker also suggests how you can resolve the issues that appear.
To manually launch the Accessibility Checker, select Review > Check Accessibility. The Accessibility pane opens, and you can now review and fix accessibility issues. For more info, go to Improve accessibility with the Accessibility Checker.
PowerPoint for the web has built-in slide designs that contain placeholders for text, videos, pictures, and more. They also contain all the formatting, such as theme colors, fonts, and effects. To make sure that your slides are accessible, the built-in layouts are designed so that the reading order is the same for people who see and people who use technology such as screen readers.
Tip: For more info on what to consider when you're creating slides for people with dyslexia, go to Design slides for people with dyslexia.
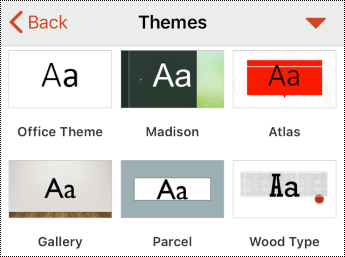
Use one of the accessible PowerPoint templates to make sure that your slide design, colors, contrast, and fonts are accessible for all audiences. They are also designed so that screen readers can more easily read the slide content.
One simple step towards inclusivity is having a unique, descriptive title on each slide, even if it isn't visible. A person with a visual disability that uses a screen reader relies on the slide titles to know which slide is which.
Use the Accessibility ribbon to make sure every slide has a title. For the step-by-step instructions, go to the section "Use the Accessibility ribbon to title a slide" in Title a slide.
You can position a title off the slide. That way, the slide has a title for accessibility, but you save space on the slide for other content. For the step-by-step instructions, go to the section "Put a title on a slide, but make the title invisible" in Title a slide.
When someone who can see reads a slide, they usually read things, such as text or a picture, in the order the elements appear on the slide. In contrast, a screen reader reads the elements on a slide in the order they were added to the slide, which might be very different from the order in which things appear.
Use the Selection Pane to set the order in which screen readers read the slide contents. Screen readers read the objects in the reverse of the order they are listed in the Selection Pane.
To find slides with a problematic reading order, use the Accessibility Checker.
In general, avoid tables if possible and present the data another way, like paragraphs with headings. Tables with fixed width might prove difficult to read for people who use Magnifier, because such tables force the content to a specific size. This makes the font very small, which forces Magnifier users to scroll horizontally, especially on mobile devices.
If you have to use tables, use the following guidelines to make sure your table is as accessible as possible:
If you do need to use tables, add headers to your table to help screen readers keep track of the columns and rows. If a table is nested within another table or if a cell is merged or split, the screen reader loses count and can’t provide helpful information about the table after that point. Blank cells in a table could also mislead someone using a screen reader into thinking that there is nothing more in the table. Screen readers also use header information to identify rows and columns.

Alt text helps people who use screen readers to understand what’s important in the visuals in your slides. Visual content includes pictures, SmartArt graphics, shapes, groups, charts, embedded objects, ink, and videos.
In alt text, briefly describe the image, its intent, and what is important about the image. Screen readers read the description to users who can’t see the content.
Tip: To write a good alt text, make sure to convey the content and the purpose of the image in a concise and unambiguous manner. The alt text shouldn’t be longer than a short sentence or two—most of the time a few thoughtfully selected words will do. Do not repeat the surrounding textual content as alt text or use phrases referring to images, such as, "a graphic of" or "an image of." For more info on how to write alt text, go to Everything you need to know to write effective alt text.
Avoid using text in images as the sole method of conveying important information. If you use images with text in them, repeat the text in the slide. In alt text of such images, mention the existence of the text and its intent.

People who use screen readers sometimes scan a list of links. Links should convey clear and accurate information about the destination. For example, avoid using link texts such as "Click here," "See this page," "Go here," or "Learn more." Instead include the full title of the destination page.
Tip: If the title on the hyperlink's destination page gives an accurate summary of what’s on the page, use it for the hyperlink text. For example, this hyperlink text matches the title on the destination page: Create more with Microsoft templates.
For the step-by-step instructions on how to create hyperlinks, go to Add a hyperlink to a slide.
An accessible font doesn't exclude or slow down the reading speed of anyone reading a slide, including people with low vision or reading disability or people who are blind. The right font improves the legibility and readability of the text in the presentation.
To reduce the reading load, select familiar sans serif fonts such as Arial or Calibri. Avoid using all capital letters and excessive italics or underlines.
A person with a vision disability might miss out on the meaning conveyed by particular colors. For example, add an underline to color-coded hyperlink text so that people who are colorblind know that the text is linked even if they can’t see the color. For headings, consider adding bold or using a larger font.
Here are some ideas to consider:
People with dyslexia perceive text in a way that can make it difficult to distinguish letters and words. For example, they might perceive a line of text compressing into the line below, or adjacent letters seeming to merge. Also, having multiple blank lines or consecutive spaces can make keyboard navigation slow and screen reader usage more cumbersome.
Align your paragraph to the left to avoid uneven gaps between words, and increase or decrease the white space between lines to improve readability. Include sufficient white space between lines and paragraphs but avoid more than two spaces between words and two blank lines between paragraphs.

To make it easier for screen readers to read your slides, organize the information into small chunks such as bulleted or numbered lists.
Design lists so that you do not need to add a plain paragraph without a bullet or number to the middle of a list. If your list is broken up by a plain paragraph, some screen readers might announce the number of list items wrong. Also, the user might hear in the middle of the list that they are leaving the list.


(Bulleted Library) or
PowerPoint supports the playback of video with multiple audio tracks. It also supports closed captions and subtitles that are embedded in video files.
Closed captions or subtitles must be encoded into the video before it is inserted into PowerPoint. PowerPoint does not support closed captions or subtitles that are stored in a separate file from the video file.
Supported video formats for captions and subtitles vary depending on the operating system that you're using. Each operating system has settings to adjust how the closed captions or subtitles are displayed. For more information, go to Closed Caption file types supported by PowerPoint.
Closed captions, subtitles, and alternative audio tracks are not preserved when you use the Compress Media or Optimize Media Compatibility features. To learn more about optimizing media for compatibility, go to the section "Optimize media in your presentation for compatibility" in Are you having video or audio playback issues? Also, when turning your presentation into a video, closed captions, subtitles, or alternative audio tracks in the embedded videos are not included in the video that is saved.
When you use the Save Media as command on a selected video, closed captions, subtitles, and multiple audio tracks embedded in the video are preserved in the video file that is saved. For more info, go to Save embedded media from a presentation (audio or video).
To make your PowerPoint presentations with videos accessible, ensure the following:
When your presentation is ready and you've run the Accessibility Checker to make sure it is inclusive, you can try navigating the slides using a screen reader, for example, Narrator. Narrator comes with Windows, so there's no need to install anything. This is one additional way to spot issues in the navigation order, for example.
Microsoft wants to provide the best possible experience for all our customers. If you have a disability or questions related to accessibility, please contact the Microsoft Disability Answer Desk for technical assistance. The Disability Answer Desk support team is trained in using many popular assistive technologies and can offer assistance in English, Spanish, French, and American Sign Language. Please go to the Microsoft Disability Answer Desk site to find out the contact details for your region.
If you are a government, commercial, or enterprise user, please contact the enterprise Disability Answer Desk.


Explore subscription benefits, browse training courses, learn how to secure your device, and more.


Communities help you ask and answer questions, give feedback, and hear from experts with rich knowledge.


Find solutions to common problems or get help from a support agent.